Lab 1: Introduction to Povray and HTML
CS 142: The Mathematics of Computer Graphics,
Spring 2007
Due Date: Tuesday, Jan 23.
Creating Your Own Web Page
You will display images created in this class on your web page so that everyone may
look at them. To see how to do do this, follow the directions here. We will go
over much of this in class as well.
Getting Started with Povray
Start Povray and open up the help documentation. In the help documentation, click on
the "Contents" tab and expand the section "Introduction and Tutorial". Click on
the "Beginning Tutorial" and work through the entire section labeled "Our First Image".
The last page "Defining a Light Source" gives the code for a complete Povray scene.
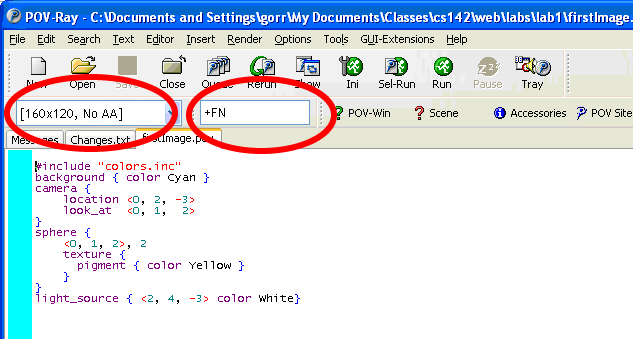
Copy and paste this into a Povray file and render the image. See picture below.
Saving Your Image
- Edit the rendering setting so that POV-Ray saves your image as a png file. You can do this by placing +FN
in the command line options text box as shown below:

- Save two versions: one image that is small (160x120) and one large (640x480). You will need to
rename the small one after you render it, otherwise the large one will over-write it.
- Create a new folder in your public_html directory called lab1_images. Copy your two images over to this
folder.
- Add the image to your web page. See sample for an example of how to add images to a web page. If you go to the menu item View and choose Program Source, you will see the html code
for this page. You may copy it and use it as a starting point for your own page.
- Open your web page in a browser to see if the image appears properly.
[top] [Schedule]
[Home]

