Lab 4: Creating an Animation Loop
IDS252: 3D Animation,
Spring 2014


Due Date: Wed, Feb 12, before the beginning of class.
Evaluation Sheet (pdf)
Goals
- Become familiar with setting and adjusting keyframes and timing to create an animation.
- Learn how to use the graph editor to adjust keyframes.
- (Optional) Learn about path animation.
- (Optional) Learn about driving keys.
- Deliverables: A 10 second animation loop. Place in
the designated
folder on cs-render. See Evaluation Sheet (pdf).
Maya Modeling Tutorials
The supplementary files you will need for the tutorials listed below can be found in the folder
IDS252Sp14\IDS252GeneralResources\GettingStartedMaya2014LessonData\Anim
Copy the entire Anim folder (but not the other folders) over
to the folder \IDS252Sp14\Lab4\MayaProjects\your_name.
You do not need to create a new project for doing these tutorials.
In Maya, go to Help → Tutorials.
Click on the link Getting Started with Maya 2014. In the contents,
click on Getting Started with Maya, and then Animation.
Do the following lessons:
- Lesson 1 (Keyframes and the Graph Editor)
- (optional) Lesson 2 (Set Driven Key). You will have the opportunity to do this later if you don't do it now.
- (optional) Lesson 3 (Path animation). You will have the opportunity to do this later if you don't do it now.
The above tutorials will not be collected. Please delete any large images files when you are done,
especially any ipr or *.iff files.
10 Second Animation Loop
- Make a Project: For the lessons below, create a project on cs-render in the folder
\IDS252Sp14\Lab4\MayaProjects/your_name
Use the default Project settings.
Remember, once the project is created, you must set the project every time you re-open
Maya to insure that Maya will save files to the right place.
-
10 Second Animation Loop: You are to create a 10 second animation with the following requirements:
- Detailed technical instructions for setting up Maya and creating the
animation can be found:
Steps in Maya for Creating an Animation
We will also go through this in class but you should also read through them on your own.
These directions include steps for "batch" rendering, which is also discussed in the tutorial
Getting Started with Maya→ Rendering → Lesson 1: Rendering a scene → Batch rendering a sequence of animation frames
- It is important to set the FPS, playback speed, and render settings, before you begin animating.
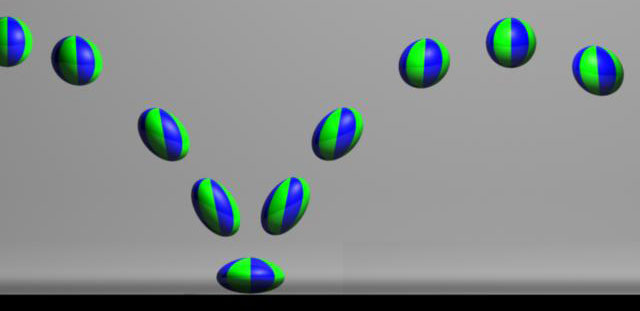
- The animation should be a loop, i.e. it should end exactly where it begins. To do this, set the
keyframe at t=1 for whatever object you are animating. Then, without changing anything in the scene, move the slider to t=300 and
set the keyframe again. At this point, you can begin animating in between.
- The motion does not have to be complex but there should be some non-trivial motion.
- Aim for realistic motion. This is difficult to do and you are just starting to animate, so do the best you can.
Observe how things move in real life. Think about the
Principles of Animation.
- Squash & stretch
- Anticipation
- Staging
- Follow-through
- Overlapping action
- Slow-in, slow-out
- Arc vs linear motion
|
- Secondary action
- Timing
- Exaggeration
- Knowledge of technique
- Observation and translation
- Appeal
- Imagination
|
You will need to use the graph editor to get the motion correct. Don't be afraid of the graph editor!
- Use any objects you have created so far, but also create a few new objects.
- Use any of the animation techniques you have learned so far, e.g. keyframing,
path animation, etc.
- It is recommended that
- Use only one camera.
Note, it is better to create a new camera (e.g. called renderCam), rather than use the default persp camera.
Once you set the renderCam's location, you can lock its transformations so that the camera is not accidently moved.
You can then use the perspective camera to move around the scene.
- Keep the camera still or, at least, limit its movements.
- Keep the lighting simple but make sure the thing you want the viewer to focus on is clearly lit and stands out
from the background.
-
When you have completed the animation, place it in the folder: \IDS252Sp14\Lab4\FinalAnimations.
Make sure that the name of your animation is named as in the previous labs.
It is very important that this lab be turned in on time because we will be giving the animations to
the music students to score. If your animation is late, it will not be scored and you will have nothing to show when
we do the joint critique with the music class. This collaboration is an important component of this lab.
Evaluation
The animation is due on Feb 12. It will be graded based on the criteria listed in the
Lab 4 Evaluation Sheet.
