Project Creation and Structure: When you create your new project (through Maya), you should use the default folders. This will insure that you have an "images" subfolder. When you create animations, you will be generating hundreds/thousands of images (i.e. frames). Your project folder will get very cluttered if these images are not rendered into a separate subfolder in your project. By including an "images" folder in your project, Maya will know to store all of the images in this separate folder. Sometimes, the rendering will also generate depth map files which will be placed in the Depth folder. Be sure to delete this after rendering in order to save disk space. You will never need these files after rendering is complete. See picture.
If you plan on using the renderfarm, please read about how to set the project path so that the renderfarm knows how to find your project.
Setting the FPS: Once the project is created and a new scene file is opened, set the frames-per-second (fps) to 30. The tutorials use 24 fps but for digital (as opposed to film) 30 fps is the standard. Before you set any keyframes, you should set the fps. To do this, go to the main Maya menu, choose Window;Setting/Preferences;Preferences.... In the Preferences window, click on Settings. In the pull-down menu labeled Time, choose NTSC (30FPS). This sets the animation to 30 frames per second (fps).
Render Settings: On the main Maya menu, choose Window;Rendering Editors;Render Settings.... Set the following:
Generating the Frames: Once you are done animating, you need to render all of the frames
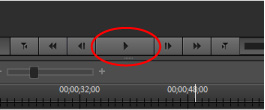
Playblast: Note, before you render the frames, you can preview the animations either by using the time controls at the bottom of the Maya screen or by using Playblast. Playblast gives more accurate timing. Both of these are described in the tutorials. You can find Playblast by going to the menu Window;Playblast.
View Sequence: Once the frames are generated, you can preview the animation sequence in Maya by going to File → View Sequence... and select the first frame in the sequence. The first pass through will be slow but then it will run at normal speed.
Generating a Quicktime Movie: To generate a quicktime (*.mov) animation, you must generate the movie outside of Maya.
In the same folder containing your Maya Project (but not inside the Maya Project folder itself), create an Editing folder. In the Editing folder, create a subfolder called images and move the images you plan to use for the animation into this images folder (this is all that should be in the images folder). The reason for moving the files is 1) to make sure you don't accidentaly overwrite your image files with Maya and 2) to make sure that you know exactly which set of images you are using for the animation (not a big deal for a 10 second animation but it will save you a lot of headaches for the 1 minute animation).
Optional Sound: If you are using sound in your animation, place the sound clip in the Editing folder.
To create the animation from the frames, you can use Adobe Premier Elements 8 (APE8) (note, it was originally believed that MPEG_Streamclip would work but it won't because it interprets the input sequence to be 15 frames per second (fps) rather than 30 fps.) Instructions for ADP8 are given below.
To create the animation, you will use software package Adobe Premier Elements 8 (APE8), which is available only on the Windows side of the computers in Ford 202 and only on the computers on the back and inner wall!
Open Adobe Premier Elements 8 (APE8) by clicking on the icon on the desktop. Click on "New Project" button. A "New Project" window should open up (if it doesn't, just select the menu File → New → Project). Enter the following:
Click the "Get Media" button and choose "PC Files and Folders". Navigate to the images folder where your sequence of image files are stored. Select the first image in the sequence. Click the checkbox labeled "Numbered Stills" at the bottom. Finally, click the open button. This should bring in and group the entire set of still frames to the Window located in the top right portion of your screen. (It will look like you just brought in one image but, be assured, the entire clip is there, assuming you selected "Numbered Stills" when loading. If not all the images are loaded it is because either one of the numbered images is missing or corrupted.)
Optional Sound: If using sound, repeat the above process to load in your sound file. You can click the show-all button to see everything you have loaded.

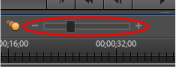
Left-Mouse drag the clip down to the Video section of the Timeline. If Premiere asks to "fix the quality", say no. If you can't see the clip in the timeline it may be because you need to zoom in. Move the scale slider to the right:
Optional Sound: If you are including sound in your animation, drag the sound down to the Soundtrack section of the Timeline. Make sure it is aligned with the video. They should begin and start at the same points on the Timeline.
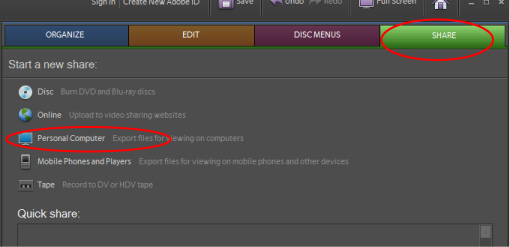
To generate and save the quicktime file, click on "Share" and then select "Personal Computer"
The set the following:
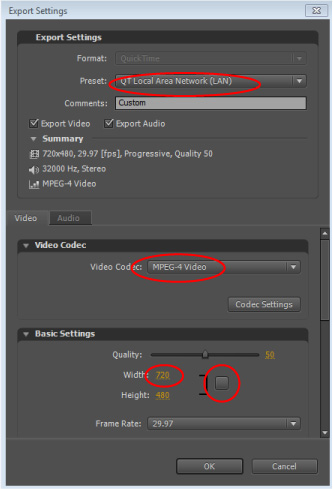
Click the "Save" button at the bottom in order to create the quicktime animation file. It may take a some time for Premiere to generate the animation.
Save the APE8 file and exit. Outside of Premiere, try to play your quicktime file to make sure it runs properly.