Pixel (and Text) Read/Writes
Jed Rembold
October 24, 2025
Announcements
- Problem Set 5 due on Monday
- Project 3: Imageshop guide will be released this weekend. We’ll introduce it on Monday in class.
- New grade reports will go out this weekend. Are you feeling things
are hopeless? The withdrawal deadline is Tuesday.
- If considering, please reach out before Tuesday, so we can figure out if withdrawing is the correct option
- A reminder that the graphics contest is live if you are interested in submitting something to that
- Polling: polling.jedrembold.prof
Pixel Manipulation
Image Thresholding
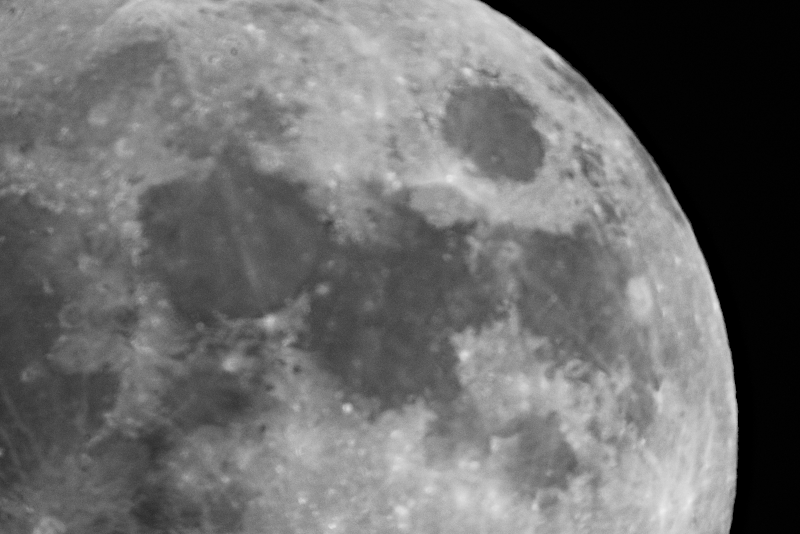
- As an example of reading and manipulating pixel values, lets look at how we could threshold the image to the right
- Thresholding is when you take a grayscale image and convert it to a black and white image, where a pixel is set to be white if it is above a certain threshold in brightness
- Grayscale, so each RGB component is the same
- Lets threshold at a value of 30
Thresholding Code
from pgl import GWindow, GImage

def threshold(e):
    thresh_value = 30
    height = len(pixels)
    width = len(pixels[0])
    new_array = [[0 for i in range(width)] for i in range(height)]
    for r in range(height):
        for c in range(width):
            if GImage.get_red(pixels[r][c]) > thresh_value:
                new_array[r][c] = GImage.create_rgb_pixel(0, 255, 0)
            else:
                new_array[r][c] = GImage.create_rgb_pixel(0, 0, 0)
    new_image = GImage(new_array)
    gw.add(new_image)

gw = GWindow(800, 525)
image = GImage("Moon.png")
gw.add(image)
pixels = image.get_pixel_array()
gw.add_event_listener("click", threshold)
Choosing Wisely
The Python package used to implement
pgl.pyalso supports a mechanism to choose files interactively, made available through thefilechooser.pylibrary module.filechooser.pyexports two functions:choose_input_filefor selecting a filechoose_output_filefor selecting a folder and filename to save a file to
Both open up a file dialog that lets you select/choose a file
- Clicking Open or Save returns the full pathname of the file
- Clicking Cancel returns an empty string
Using it thus looks something like:
filename = choose_input_file()
with open(|||filename|||) as |||f|||:
    |||Code to read file|||
Reading Other Files
Reading
- Programs often need to work with collections of data that are too
large to reasonably exist typed all out in the code
- Easier to read in the values of a list from some external data file
- A file is the generic name for any named collection of data maintained on some permanent storage media attached to a computer
- Files can contain information encoded in many different ways
- Most common is the text file
- Contains character data like you’d find in a string
Strings vs Text Files
- While strings and text files both store characters, there are some
important differences:
- The longevity of the data stored
- The value of a string variable lasts only as long as the string exists, is not overridden, or is not thrown out when a function completes
- Information in a text file exists until the file is deleted
- How data is read in
- You have access to all the characters in a string variable pretty much immediately
- Data from text files is generally read in sequentially, starting from the beginning and proceeding until the end of the file is reached
- The longevity of the data stored
Opening Text Files
The general approach for reading a text file is to first open the file and associate that file with a variable, commonly called its file handle
We will also use the with keyword to ensure that Python cleans up after itself (closes the file) when we are done with it (Many of us could use a
withirl)with open(|||filename|||) as |||file_handle|||: |||Code to read the file using the file_handle|||Python gives you several ways to actually read in the data
readreads the entire file in as a stringreadlineorreadlinesreads a single line or lines from the file- Can use the file handle as an iterator to loop over
Entire file ⟶ String
The
readmethod reads the entire file into a string, with includes newline characters (\n) to mark the end of linesSimple, but can be cumbersome to work with the newline characters, and, for large files, it can take a large amount of memory
As an example, the file:
One fish
two fish
red fish
blue fishwould get read as
"One fish\ntwo fish\nred fish\nblue fish"
Line by Line
Of the ways to read the file in a string at a time, using the file handler as an iterator and looping is probably best and certainly most flexible
Leads to code that looks like:
with open(|||filename|||) as |||f|||:
    for line in |||f|||:
        |||Do something with the line|||
Note that most strategies preserve the newline character, which you very likely do not want, so be ready to strip them out before doing more processing
Where Strings and Lists Meet
- There are a handful of methods that transition between strings and lists
| Method | Description |
|---|---|
|||string|||.split() |
Splits a string into a list of its components using whitespace as a separator |
|||string|||.split(|||sep|||) |
Splits a string into a list using the specified separator
sep |
|||string|||.splitlines() |
Splits a string into of list of strings at the newline character |
|||string|||.join(|||a_list|||) |
Joins the elements of the a_list into a
string, using string as the separator |
Powers Combined
So long as your files are not gigantic, using
readand then thesplitlinesmethod can be a good optionThis does remove the newline characters, since it splits the string at them
with open(|||filename|||) as |||f|||:
    lines = |||f|||.read().splitlines()
|||Then you can do whatever you want with the list of lines|||
Writing: Mostly Like Reading
You can write text files using almost the same syntax as reading:
with open(|||filename|||, |||mode|||) as |||file_handle|||:
    |||Code to write the file using file_handle|||
Note the
|||mode|||parameter toopenhere! Mode is a string which is either"w"to write a new file (or overwrite an existing file)"a"to append new contents to the end of an existing file
The file handler supports the methods:
.write(|||string|||)to write a string to the file.writelines(|||iterable of strings|||)to write each iterable element to the file
Understanding Check!
To the right are the contents of a text file named
PBride.txt. Which code snippet below would
print off the word “father”?
My name is Inigo Montoya.
You killed my father.
Prepare to die.
with open('PBride.txt') as f:
for line in f:
w = line.split()
if w[0] == "You":
print(w[-1])c = read('PBride.txt')
print(c.find("father"))with open('PBride.txt') as f:
c = f.read().splitlines()
print(c[1][4])with open('PBride.txt') as f:
c = f.read()
i = c.find("f")
print(c[i:i+6])On the Case for an Example
Fingerprints!
- Suppose we had a text file that stores information about a
particular users fingerprint
- Name, dimensions, and the print itself
- We want to read this information in and display the fingerprint as a
GImage - Then we want to allow the user to click on parts of the fingerprint and store those important coordinates to a file
- How might we go about doing this?
One approach
from pgl import GWindow, GImage, GOval

SCALE_FACTOR = 3
MARKER_SIZE = 10

with open('User1_Original.txt') as fh:
    name = fh.readline().strip()
    width = int(fh.readline().strip())
    height = int(fh.readline().strip())
    fp = fh.read().splitlines()

# Initially clean out points for new run
with open('points.txt', 'w') as fh:
    pass # Not doing anything, because just opening it clears things

print(name)
print(width)
print(height)
print(fp) #list of strings

# Make our scaled window
gw = GWindow(SCALE_FACTOR*width, SCALE_FACTOR*height)

# Create our array and populate it
pixel_array = [[0 for i in range(width)] for j in range(height)]
for r in range(height):
    for c in range(width):
        if fp[r][c] == 'M':
            pixel_array[r][c] = GImage.create_rgb_pixel(0,0,0)
        else:
            pixel_array[r][c] = GImage.create_rgb_pixel(255,255,255)

# Convert our pixel array to a GImage, scale it, and add it
fp_image = GImage(pixel_array)
fp_image.scale(SCALE_FACTOR)
gw.add(fp_image)

# Handling interactivity
def click_action(e):
    """Marks the clicked loc with a red dot and writes to file"""
    mx, my = e.get_x(), e.get_y()
    marker = GOval(mx - MARKER_SIZE/2, my - MARKER_SIZE/2,
                   MARKER_SIZE, MARKER_SIZE )
    marker.set_filled(True)
    marker.set_color("red")
    gw.add(marker)

    with open('points.txt', 'a') as fh:
        fh.write(f"{mx},{my}\n")

gw.add_event_listener("mousedown", click_action)
ImageShop
Introducing ImageShop
- While you have a PS due on Monday, the next project will be due the week after afterwards
- Taking a moment today to introduce ImageShop, and the guide will be posted by tomorrow
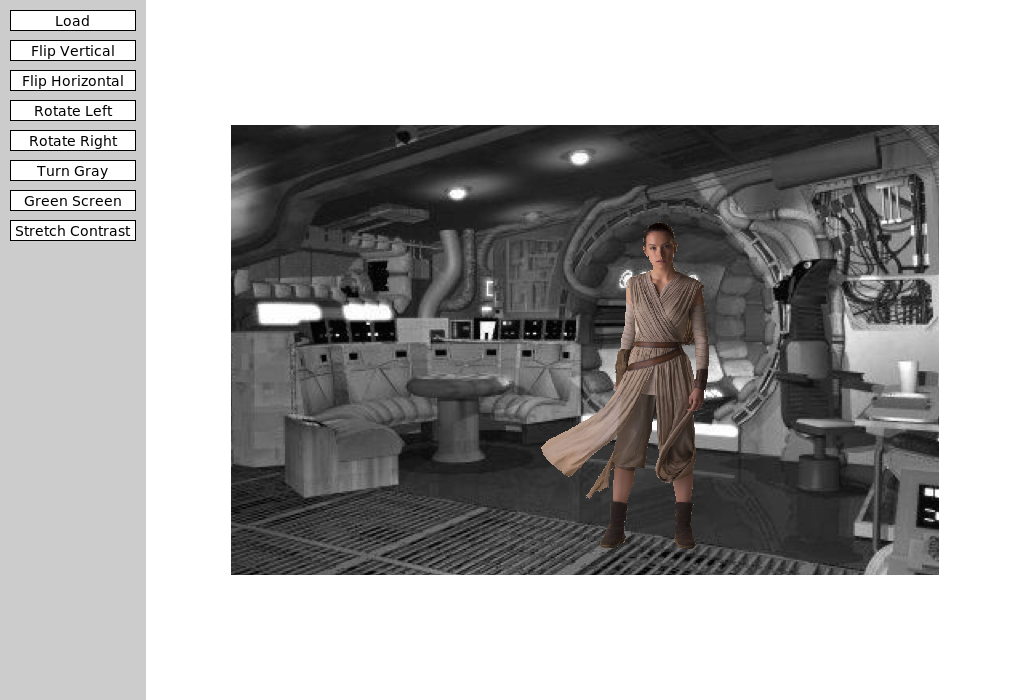
Starting
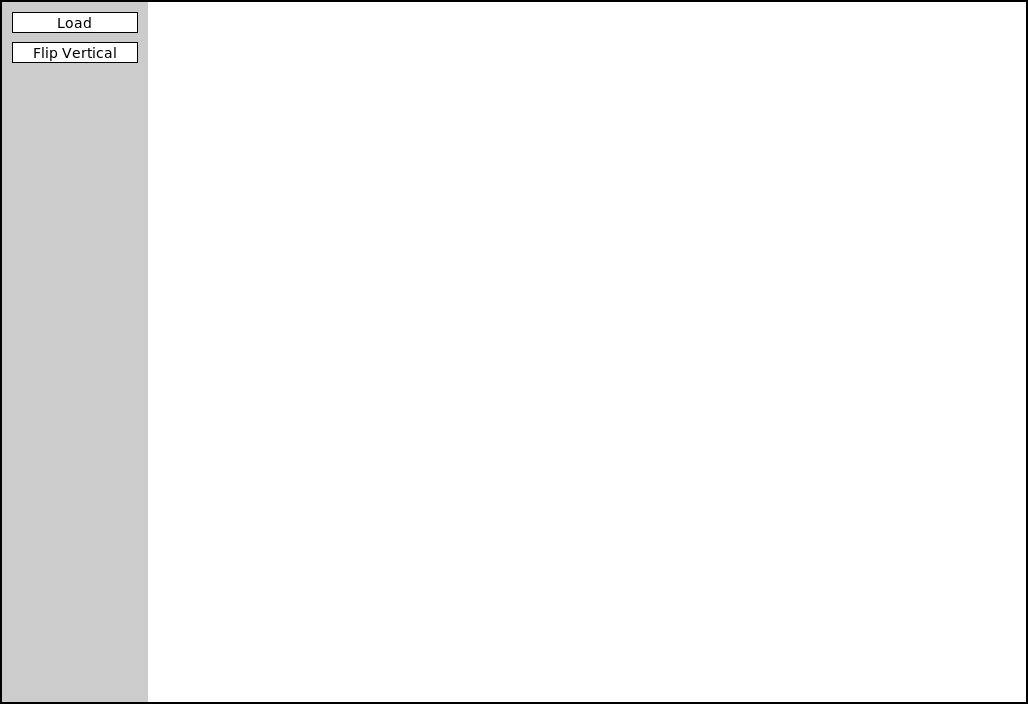
- ImageShop initially has only two buttons
- “Load” will bring up a file selection box where you can choose what
image to display
- Internally, this is handled by a function that returns the chosen file path
- “Flip Vertical” is the example feature button that flips an image vertically
- “Load” will bring up a file selection box where you can choose what
image to display
Big Picture
- Each milestone in ImageShop boils down to:
- Adding a button to the window to handle a new feature
- Writing a simple callback function that sets the new image to be equal to the output of a new function you’ll write
- Writing that function, which will generally return a
GImagetype object
- You are always free to write whatever other helper functions you might like!
So Many Files!
- ImageShop is the first project to start leveraging multi-file
layouts:
- Some functions will already be provided in
GrayscaleImage.pythat you can import into your main program - You are encouraged to write the necessary functions for Milestone 4 in their own file and import them in accordingly
- I’ve seen you all scrolling madly around trying to find the code you want. This helps with that!
- Some functions will already be provided in
GButtons
- To help facilitate working with buttons, ImageShop introduces a new
type called
GButton - There is nothing magical about these! They are just pre-bundling PGL concepts that you already know like labels and mouse click events
- Each
GButtongets a label and a callback function name that determines what function is called when that button is clicked - ImageShop will come with a pre-defined
add_buttonfunction which will take care of adding a new button to the correct part of the screen.- You’ll just need to provide it a label and function name to callback to
The Current Image
- ImageShop holds the
GImagecurrently displayed on the window in a variable calledgw.current_image - The variable is specifically added as an attribute to
gwso that you will have access to it in any callback function you write - This will generally be the input to your various image manipulation functions, since most of those functions work with whatever image was currently displayed on the screen
- Your callback function should run
set_imageon the output of your manipulation function, which will take care of updating the value ofgw.current_imageand displaying the new image in the window
Milestone 0
- Milestone 0 has you adding a “Flip Horizontal” button
- Add the button
- Add the action callback function
- Write a function to manipulate the pixels to flip the image horizontally
- Slightly more complicated than the example function, but not much
Milestone 1
- Here you will add buttons to rotate the image left or right (or CW or CCW if you prefer)
- Most of the difficulty comes in keeping track of of rows and columns
- Need to create a new list of lists of the correct dimensions
- Need to copy over the pixels from the original to the needed location in the new list

Milestone 2
- Here you’ll add a button to convert an image to grayscale
- If you understand the other library files that have been given to you as part of the project, this milestone should be the simplest!
- Don’t copy. Import!
Milestone 3
- Here you get to enable a green screen effect!
- Unlike other buttons, when this one is clicked, you should use the
file chooser library to prompt the user to select another image
- This is the image that will be overlaid on whatever image is currently shown on the screen
- You will want to start with an “empty” pixel array with the same dimensions as the background
- This will closely mimic our in-class example from Friday, where
depending on how “green” a pixel is, you will choose between different
choices
- If green enough, you will copy the pixel from the background image to your new pixel array
- If not green enough, you will copy the pixel from the foreground image to your new pixel array
Milestone 4
- Here you’ll implement one algorithm for increasing dynamic contrast across an image!
- Doing so requires several steps and different functions. It can be
convenient to place these in their own file and import them into
ImageShop.pyas needed.- Compute all the pixel luminosities
- Construct a histogram of these luminosity counts
- Your histogram should have 256 elements, one for each possible luminosity
- Construct a cumulative histogram using your histogram
- Use the cumulative histogram to adjust the luminosity of each pixel in the pixel array
- You don’t need to display the visual histograms! But they can be a
great way to check that you are doing the other parts correctly.
- Related to Problem 1 on this week’s PS
Extensions
- Give yourself time for extensions on this project!
- They are easy! Just come up with interesting or cool graphical effects and add a button for them!
- You’ll look at several this week in your section meetings
- Adding these in your project is encouraged and will be regarded as “sub-extensions”, but come up with your own as well!