 |
Lab 7: Textures
|
|
Lab 7: Textures
|
Before you begin, review the following:
To add textures to your scene, you need to address the 3 items below. The directions will lead you through each of these :
Starting Code:Begin with your completed project from Lab 5 Lighting and Shading, using Phong Shading.
Texture Coordinates: To add the texture coordinates, you need to do the following:
Add Texture Coordinate Arrays: Similar to the vertices and normals, add texture arrays to each of your objects (Cone, Cylinder, etc ). Note that texture coordinates are 2D thus they are stored in vec2 variables rather than vec4. This is already done for you in Cube.js.
Load Texture Buffers: In the initBuffers function of Shapes.js, load the texture coordinates into an array buffer, e.g. called texBuffer.
Bind the texture arrays when drawing object: In the drawPrimitive function of Shapes.js,
bind the texture buffer. Be careful, it will have a different size than the other buffers because its elements are vec2 and not vec4. Unbind after drawing the primitive.
Texture Objects: To add the textures, you need to do the following
Download the folder textures.zip. Unzip place the texture folder into your project folder for Lab 7. It contains
In start_here.js, load the .js files into the program. Also, change the heading from Lab 5 to Lab 7.
In render_scene.js, add global variables at the top for checkerboard and imageTexture
objects. In order to create the actual texture objects, you need the gl object, so
create the objects in init function after gl is created:
checkerboard = new Checkerboard();
imageTexture = new ImageTexture("textures/test.jpg");
Create a global variable (uTexture) for the shader uniform variable. In the shaderSetup function, add the code for uTexture similar to the other
uniform variables.
When you want to use a texture (e.g. imageTexture or checkerboard), you need to activate the texture, e.g. imageTexture.activate(); In render, be sure to activate the texture you want before drawing your shape, e.g.
imageTexture.activate();
Shapes.drawPrimitive(Shapes.cube);Vertex Shader: Recall that attribute variables (e.g. vTexCoords) are associated with vertices and thus can only be added to your vertex shader. However, you need the texture coordinates in your fragment shader. So you need to create a varying variable to pass the interpolated texture coordinate from the vertex to the fragment shader. So, to your vertex shader, add your attribute and varying variables
attribute vec2 vTexCoords;
varying vec2 texCoord;texCoord = vTexCoords;varying vec2 texCoord;uniform sampler2D uTexture;vec4 myColor = texture2D( uTexture, texCoord );Phew! You should be able to run your code now. Fingers crossed!
|  |
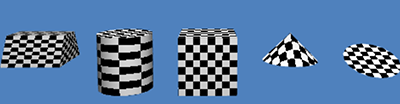
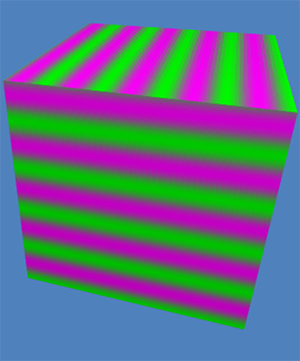
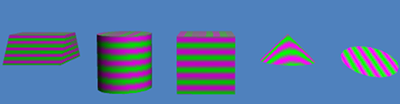
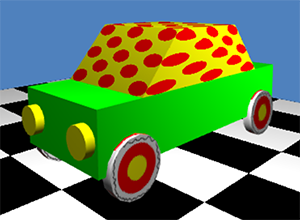
Add several other procedural textures that you have designed yourself. Some textures are shown here: 2D Procedural Textures. Here we have soft bands
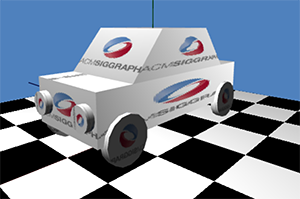
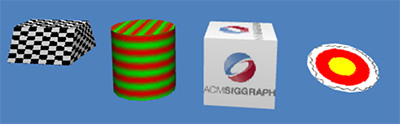
Add several different imageTexture objects so you can use more than one in a scene.
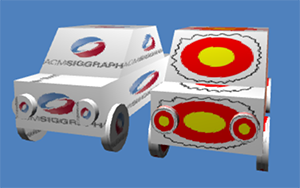
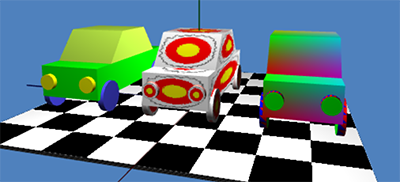
Create a scene that uses all of your textures.
When your run your code, everything gets it's color from a texture. However, you may sometimes want a texture and, at other times, a uniform color, or something else. You are now to modify your code to make it possible to select which kind of color you want. Let's list all of the possible choices:
To be able to choose:
Add a uniform variable, e.g. called uColorMode, which you can set to one of the above choices (0-3). At this point, you should know all of the code necessary for adding uniform variables so the details are left you!
In your fragment shader, add if-else code that sets myColor depending on the value of uColorMode. If the color is to be calculated in the shader, you can just set the color to a fixed color (e.g. white) or you can do something more elaborate as was done in the fractal lab.
In the render function, each time you draw a shape, you should set uColorMode to the index of the kind of color you want to use. If you use a texture, you need to be sure to activate the desired texture. If you use uniform colors, you need to set the value of uColor.
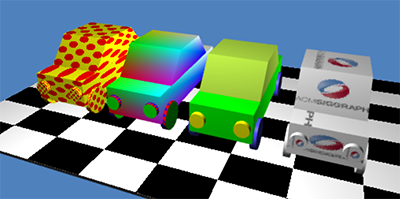
Create a scene with various objects, where each type of color is used.
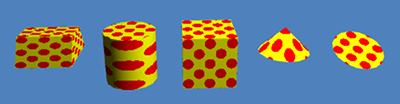
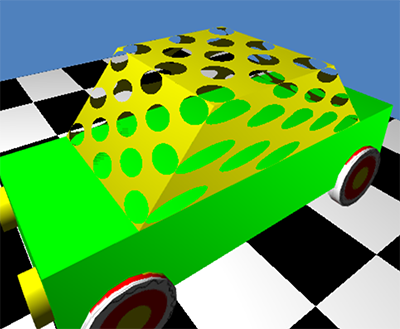
There are many other tricks you can do right in the shaders. For example, there is a discard function that lets you throw fragments away. This is completely different from setting a fragment to be transparent (ask why if you want to know). Here is the result when the dots of the polka dot pattern are discarded:
By the beginning of lab on the due date above, be ready to demonstrate your finished program. The scene should include:
Then submit your code to WISE: