IDS360: 3D Virtual Sculpture, Spring 2012
Start Maya and create (or set) the project (it should reside on cs-render in the folder IDS360Sp12/Lab2/your_login_name.)
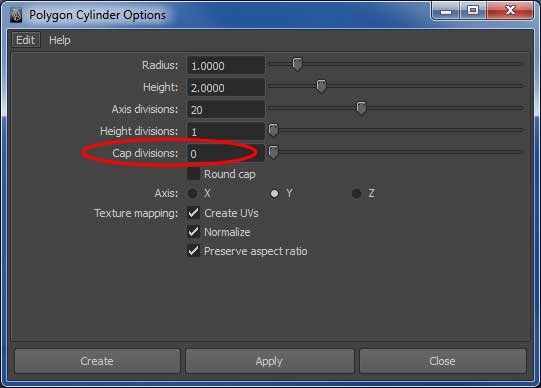
Create a polygon cylinder. Reset the options in the options box, and then set "cap divisions" to 0. See picture.
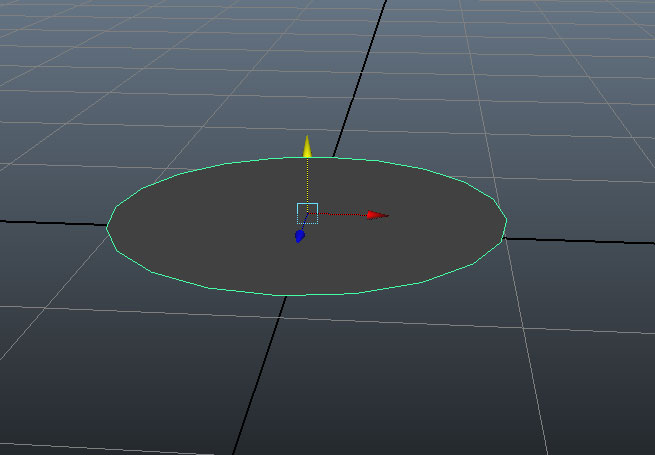
Delete all the faces except those on one of the ends, leaving a disk. See picture. Scale the disk to the size you want.
Select Modify->Center Pivot so that the disk's pivot point is in it's center.
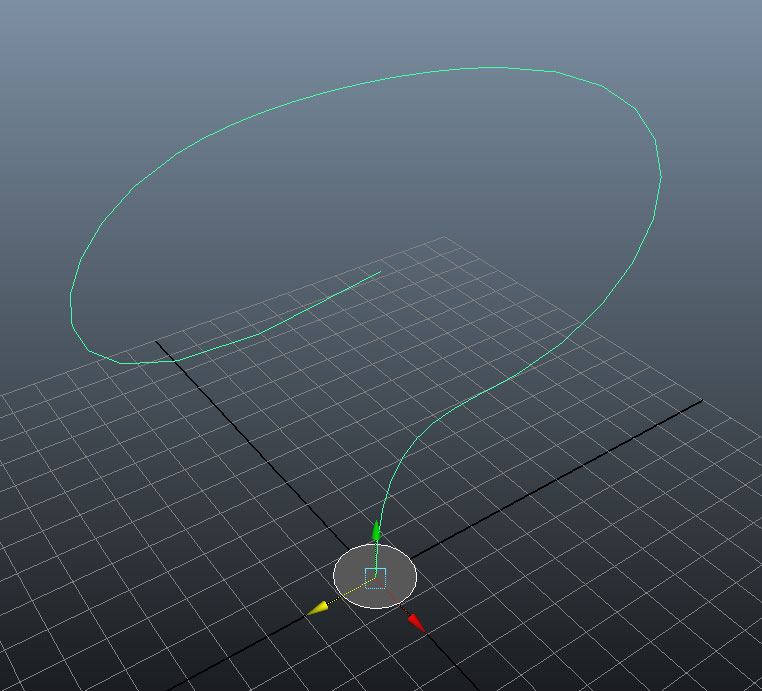
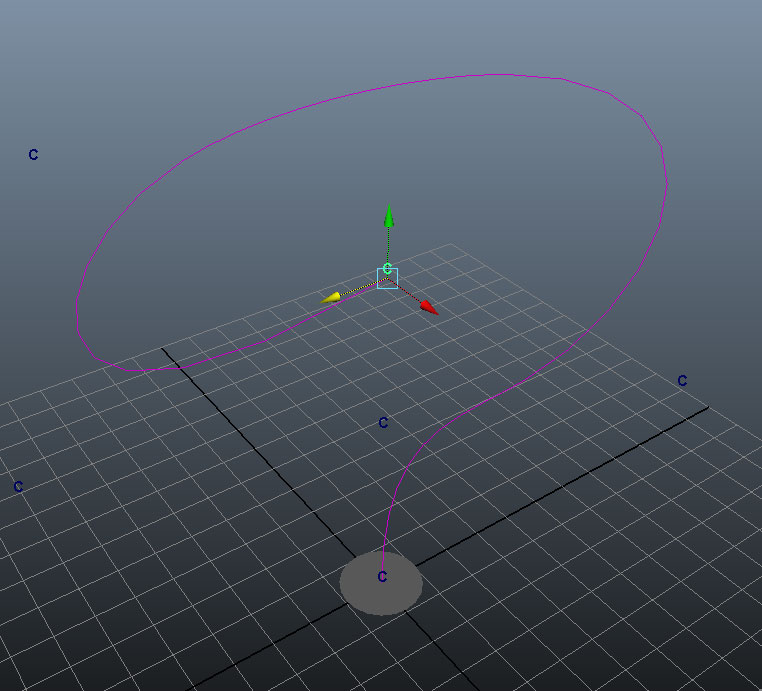
Create a CV curve follows the tubular shape you want to make. Use as few CV points as possible (this will make it easier to create an emphatic shape). Move the disk and/or curve so that the disk is perpendicular to, and at one end of, the curve. See picture
If you want the option of moving the CVs around later, it helps to set cluster curves as follows: Select your CV curve, go to the Surfaces menu set. Select Edit Curves -> Selection-> cluster curve See picture.
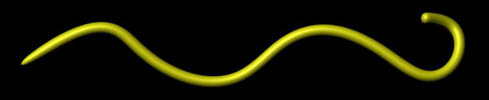
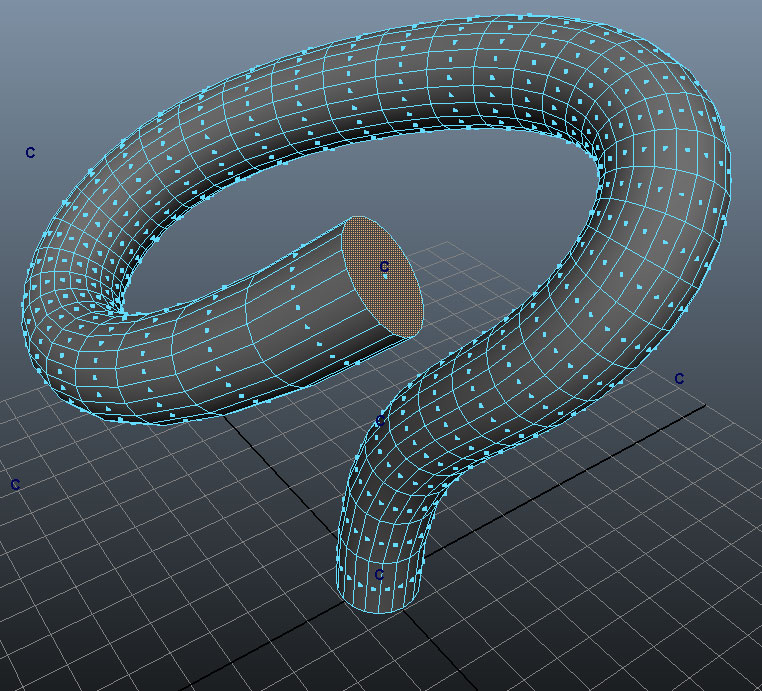
Select the disk, then shift select the curve. In the polygon menu, go to Edit Mesh -> Extrude ◻ You will want to significantly increase the number of divisions, depending on the length of the curve and the desired smoothness. Start with around 20, and increase it using the "divisions" slider during the extrude. You should end up with a curve that looks something like this. You can also apply "smoothing" later on if you want even more smoothing (select the Polygon menu set, then go to the menu Mesh->Smooth). Periodically render the object to see if the it has your desired look.
Making changes to the shape: Note, you can change the shape of the tube by moving the cluster controls (the "C"s in the view). If you have trouble selecting the clusters, open up the Outliner and select them there. Reshaping the tube this way only works to a certain extent, so it is best to get the original CV curve as close as possible to the desired shape. If you want to make more major changes, you can always undo the extrude, reshape the CV curve, and extrude again.
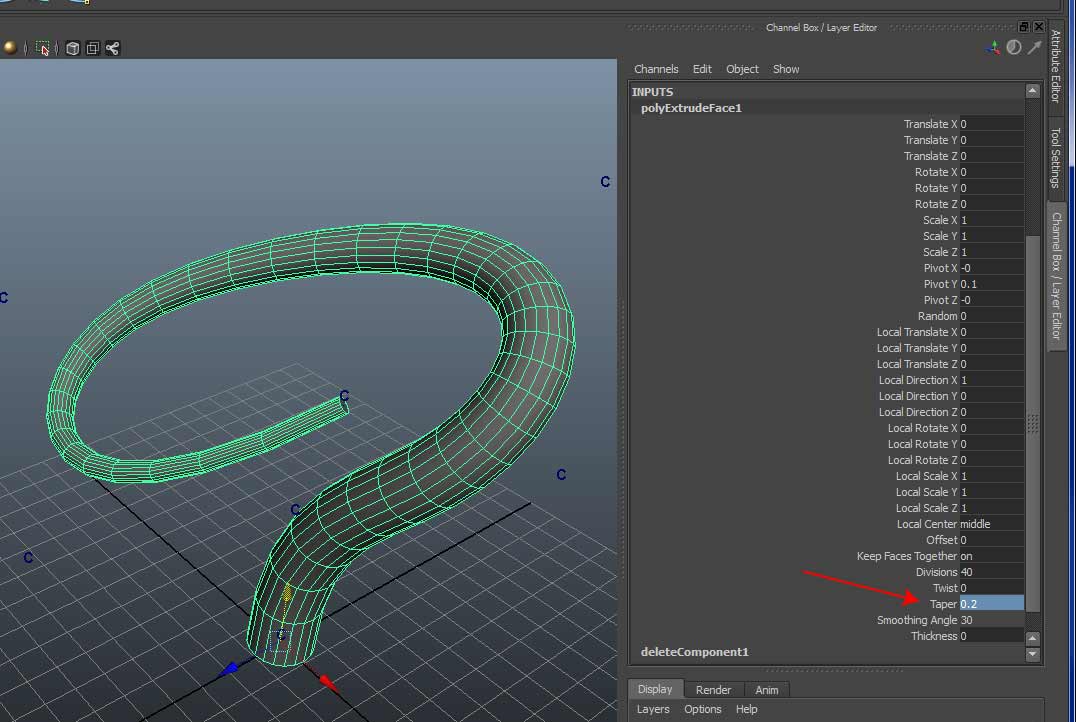
You can taper the tube by selecting the tube in object mode, opening the Channel box, under INPUTS, selecting the polyExtrudeFace1 node, and scrolling down to find the taper option. See picture