Optional: If you have your own laptop, now is also a good time to get everything working on it. You can download Netbeans (see instructions on Links page). If you have problems, bring your computer to class to get help from the instructor or lab assistant. You can also stop by WITS to get help.
Instructions for writing your first program:

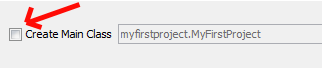
Creating a New Class: Right click on the project name in the Projects tab (left side of window). Select New→Java Class. For the Class Name, enter MyFirstClass and then click the Finish button. A new panel should open. Its tab name should be MyFirstClass.java.
public class MyFirstClass {

}
Add code so that the final program looks like (pay careful attention to the indentation):
public class MyFirstClass {
    public static void main(String[] args) {
        System.out.println("Hello Willamette!");
    }
}

 .
.
Congratulations, you have just written and run your first program!
What Just Happened?: Now, exit Netbeans and navigate to your CS141\Lab1 folder. Look at what folders and files are stored there.
In the very old days (before you were born!) computers could only display text. Each character on the keyboard was given a 7-bit code representation called it's ASCII code. This was later extended to 8 bits (the Extended ASCII code) so more symbols could be represented. For example, the ASCII code for the letter 'A' is 01000001. If we interpret this as a base 2 number (don't worry if you aren't familiar with base 2), it can be interpreted as the decimal number 65.
The ASCII code is still used as the underlying representation of what we call "text", or in the language of Java, "Strings". If you create a document in Notepad, your document is stored exclusively in ASCII. In the above program, we have the print statement:
The characters inside the quotes (Hello Willamette!) is a sequence of ASCII characters called a String.
"ASCII Art" are images that are created using only ASCII characters, for example:
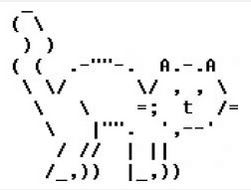
We will look at all of the class's artwork in class!
This lab will not be collected. However, you are expected to understand and do everything in this lab. If you have questions, please ask either the instructor or lab assistant for help. Every lab builds on the previous labs. Thus, for the next lab, it will be assumed that you understand all of this.