Lab 3: Lighting and Shading
IDS252: 3D Animation,
Spring 2015
Due Date: Tues, Feb 10, before the beginning of class.
Evaluation Sheet (pdf)
Word Assignments
Due Date: Tues, Feb 10, before the beginning of class.
Evaluation Sheet (pdf)
Word Assignments
The main artistic goal of this lab is to use lighting and shading to help convey the mood and meaning of a scene. The main technical goals are:
Go to the Introduction to Maya 2015. The following lessons are suggested especially if the Autodesk tutorials are confusing or if you want to go beyound the tutorials.
All of the folders and files that you will need for the Maya tutorials in this section are on cs-render in the folder
In Maya, go to Help → Tutorials. Click on the link Getting Started with Maya 2015. In the contents listed under Getting Started with Maya, do the following:
In the tutorial section Rendering. Do the following lessons:
In the tutorial section Polygon Texturing, do the following:
The above tutorials will not be collected.
When done, please delete any *.iff files (e.g. all of those Apple.000x.iff files) or any files with "ipr" in the name. There are a lot of them, you don't need them, and they are really large. We don't want to run out of space on the shared drive!
The goal of this portion of the assignment is to use materials, lighting and camera to convey the meaning of a word you have been given. You are to aim for as much realism as you can given your current technical skill.
In class, you will be assigned a word representing an emotion, mood, atmosphere. To help you get started, see if you can answer the following about your word:
You are to make the scene as realistic as possible (given the lighting and shading skills you currently have). Generate two images:
Brightness: An image displayed on a computer monitor always looks a lot brighter than the same image displayed on a projector. You should aim to make the image look good for the projector. To do this, you not only need to increase the overall brightness but also to exaggerate contrast in your image. If you can't check the image on the room projector, plan on making your image brighter than what looks good on the monitor. And always try to increase contrast.
Size: The size of the images should be HD540 as before. Be sure to use mentalray. Check for image for aliasing problems. If you see jaggies, you should try going to the render settings, selecting the Quality tab, and increasing the quality parameter. In general, the default parameters in mental ray do a pretty good job.
Suggestions for the scene:
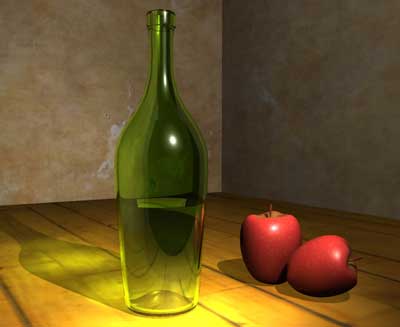
Materials and Shaders: Include in your scene at least 3 or 4 different objects that in real life have different types of surfaces. For example, a scene of a dinner table might have a wood surface, glassware, plates, silverware, etc. You may use objects you have already created in a previous lab but be certain to include a few new ones as well. Make sure that textures are scaled appropriately, e.g. you don't want a brick wall where each brick is huge. Image textures can be obtained from many places including your own photos or going to Mayang. Procedural textures (e.g. wood) can sometimes be difficult to be made to look realistic without a lot of parameter tweeking.
Lights: Try to use 3-point lighting. In any case, limit the number of lights, e.g. try not to exceed 3. Lights are important in focusing the viewers eye to what is important. They also help to clarify (or hide) shapes and features of objects. Can you explain the purpose of each of the lights in your scene? Recall that for 3-point lighting, there are key, fill, and rim lights.
Story: Part of conveying a mood, is telling a story. The image you create is a snapshot out of that story; the snapshot contains elements that hint at what has happened before or what might happen in the future. What story is your scene telling?
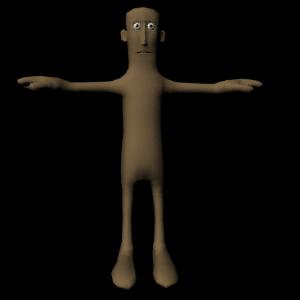
Character: You may use bloke or the simple_human_rig, both of which can be found on cs-render in the folder \IDS252Sp15\IDS252Resources\Rigs. However, don't rely on the characters completely to convey the word you have been assigned. The light and textures must do most of the work.
 |  |
| | |
Color: To create color unity, choose the dominent colors based on a chosen color scheme. Keep it simple.
Composition: When composing your picture, consider design principles. Where is the eye drawn (focal point)? Even though you are aiming for realism, still try to create a sense of cohesion through color, shape, light/dark, etc. Experiment with camera and light placement.
Your work is due on the date at the top of this lab. There is also a link to the evaluation sheet, which will be used during the critique (attendance is important!)
Copy both images over the \IDS252Sp15\Lab3\FinalImages\your_name. It should be clear which is your primary image (i.e. the one based on the word you were given) and which is the contrasting image.
Make sure your project is also on cs-render in the folder \IDS252Sp15\Lab3\MayaProjects\your_name. Your project and scene file should be well organized (objects are named and grouped, unneeded items are deleted, etc). Please delete any image ipr or *.iff files in your project folder. .