Lab 4: Creating an Animation Loop
IDS252: 3D Animation,
Spring 2016


Due Date: Tues, Feb 16, before the beginning of class.
Evaluation Sheet (pdf)
Goals
- Become familiar with setting and adjusting keyframes and timing to create an animation.
- Learn how to use the graph editor to adjust keyframes.
- Experience how music can enhance/alter your animation.
- Deliverables: A 10 second animation loop, in quicktime format (.mov). Place in
the designated
folder on cs-render. See Evaluation Sheet (pdf).
Links
Principles of Animation
I can't stress how important the Principles of Animation are if you want your animation to really come to life.
Become familiar with them. For this lab, see if you can apply one or two of them to your animation.
- A list of these principles is given here: Principles of Animation.
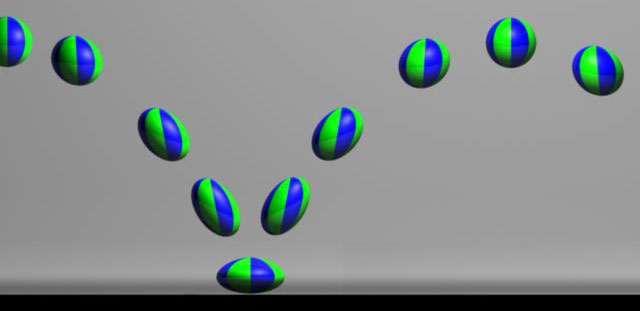
- Squash & stretch
- Anticipation
- Staging
- Follow-through
- Overlapping action
- Slow-in, slow-out
- Arc vs linear motion
|
- Secondary action
- Timing
- Exaggeration
- Knowledge of technique
- Observation and translation
- Appeal
- Imagination
|
- You can watch Digital Tutors videos for each of the principles by going here:
12 Principles of Animation in Maya. Additional notes on Ease in and Ease out are described
here.
Digital Tutors Tutorials
To learn the technical elements of animation, the following tutorials are suggested:
- Introduction to Maya 2016,
Lessons 54-64, particularly 54-58.
- Quick Start to Animation in Maya 2015.
All of the lessons are worthwhile, particularly:
- Lesson 2 Setting your animation preferences
- Lesson 3 Exploring the playback controls
- Lesson 4 Keyframing with the Channel Box
- Lesson 5 Creating keyframes with the Set Key
- Lesson 8 Managing animation in the Graph Editor
- Lesson 10 Reviewing your animations in real-time with Playblasts
- More details about the technical aspects of Maya animation can be found at
Introduction to Animation in Maya 2013
Maya Animation Tutorial - Ping Pong (not collected)
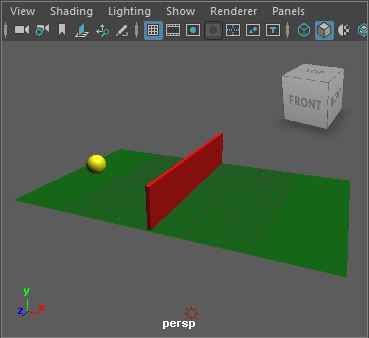
This will not be collected but it is a really important tutorial if you want to have a
clue about how to begin doing animation. After this lab, it will be assumed you know how to
work with keys, the timeline, animation preferences, and the graph editor.
Create a new project on cs-render in the folder: \IDS252Sp16\Lab4\MayaProjects/your_name
and save Keyframing.mb into the scenes folder.
In Maya, go to Help → Tutorials→ Maya Tutorials.
Click on the link Getting Started with Maya 2015. In the contents,
click on Getting Started with Maya, and then Animation.
Do the following lesson:
- Lesson 1 (Keyframes and the Graph Editor). The Graph Editor is very important. Often it is the only
way to obtain a desired behavior or to to fix animation problems.
The above tutorial will not be collected. Please delete any large images files when you are done,
especially any ipr or *.iff files.
Working with A Rigged Character
Before beginning this, you must have completed Lesson 1 above.
- Project: Use the same project you used above.
- Create a new scene file and set the animation frames per second (fps) to NTSC(30fps) by setting the Time option in Preferences (Select the Settings category, in the Working Units section):
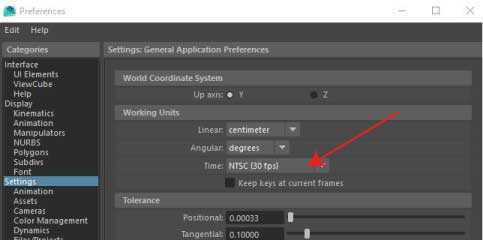
The default is 24fps. If you forget to change this to 30, correcting it later will mess up your keys and
will be a real pain to fix.
- Import a copy of Bony (from lab 2) into your scene. In class, we will talk about the concept of
pose-to-pose animation vs straight ahead. Here you are to experiment with pose-to-pose.
- Keep this simple. You may or may not end up using this within the
final 10 sec animation (next section) which is the final deliverable of the lab.
- You need to have reference of some simple behavior. It could be as simple as
having Bony go from a sitting to standing pose (or vice versa). One option is to get together with at least
2 other people in the class: one person to be the reference character and the other two to
film the movement simultaneously from front and side. This movement should involve just a few key
poses. Alternatively, if you want something just a little more complex, you can go to the Endless Reference videos (in the resource folder on cs-render) and select a video from the Kick, Knee, or Punch folders.
Select one that is really short and not too complex, e.g. something that has no more than 3-4 key poses.
Whatever reference you use, identify the key poses - either make a copy from the video of the pose (from front and side) or do a quick sketch showing the main body positions. Make a note of the time/frame of each pose. This
timing will give you a first passs at the timing of your animation. As was shown in class, pose Bony at each key pose, keyframing all of the controls at, and only at, these key poses.
- Run the animation. To adjust the timing you should move a pose (i.e. all of the keys at a given frame) to another frame location. To move a pose, go to the graph editor and select all the keys at that pose.
Set the transform tool to the move tool. Shift-draw the keys left or right to move them. By
pressing the shift key, you will be sure that the animation keys move only along x and not along y.
Move the keys around until you feel the timing is correct. Make any needed fine adjustments to the
poses.
- What you have just done is referred to as blocking out the animation. To refine it, you will
need to add additional in-between poses and adjusting tangents as you go. Don't bother to do this right now
unless you plan to use this for the next part.
10 Second Animation Loop
This is the main deliverable of the lab. We will be giving this animation to music students for them to score. If it is late, your animation will not be scored. This will hurt your final grade.
-
10 Second Animation Loop: You are to create a 10 second animation with the following requirements:
- Set the fps to NTSC 30 before you begin animating.
- The animation should be a loop, i.e. it should end exactly where it begins. To do this, set the
keyframe at t=1 for whatever object you are animating. Then, without changing anything in the scene, move the slider to t=300 and
set the keyframe again. At this point, you can begin animating in between.
- Use Bony since he is fairly simple and you will not have to
deal with facial controls. Use pose-to-pose to animate Bony. Start with the
animation you created in the section above if you want. Be sure to use
reference.
Also use any objects (temple, glass, etc) you have created so far. If you want, create a few new objects but only if they are fast to create.
- Keep in mind the Principles of Animation.
- Use the graph editor!
- In order to really focus on the animation, KEEP EVERYTHING ELSE SIMPLE. It is strongly recommended that you
- Use a limited color palette. Avoid distracting textures. Better to use solid colors. Your goal is to
make the movement feel realistic.
- Use only one camera. Keep the camera still or, at least, limit its movements to a few cuts.
- Don't use the default perspective camera. Instead, create a new camera (e.g. called shotCam).
Once you set the shotCam's location, you can lock its transformations so that the camera is not accidently moved.
You can then use the perspective camera to move around the scene.
- Keep the lighting simple but make sure the thing you want the viewer to focus on is clearly lit and stands out
from the background.
- Keep the environment simple. You don't want to spend lots of time on modeling and shading.
- Detailed technical instructions for setting up Maya and creating the
animation can be found:
Steps in Maya for Creating an Animation
We will also go through this in class but you should know where to find them if you have questions about what to do.
- Make sure you save the animation as a quicktime file, i.e. the extension of the file created by your video editor should be .mov
-
When you have completed the animation, place it in the folder: \IDS252Sp16\Lab4\FinalAnimations. It must be in quicktime (*.mov) format because this is
what the musicians need.
Make sure that the name of your animation is named as in the previous labs.
It is very important that this lab be turned in on time because we will be giving the animations to
the music students to score. If your animation is late, it will not be scored and you will have nothing to show when
we do the joint critique with the music class. The music collaboration is an important component of this lab.
