Due Date:
Tuesday, Oct 5 at 9am. Note, this assignment will graded as pass/fail (10 pts).
The main goals of this lab are to:
Select several of your own images to work with. If they are large, it is recommended that you shrink them down to the appoximates size of your Processing window, e.g. 400x400. Use your favorite photo editing program to do the shrinking (e.g. Photoshop, Paint, etc - ask the instructor if you need help doing this!).
Work through the examples in the text and online to become familiar with working with text and images.
As you encounter Processing commands or structures (e.g. PImage, image, PFont, etc), look them up in the online Processing reference to better understand how they are used. Look for other related commands that may be of use. Note, when we cover arrays in a later lab, we will be working with images in more detail. For now, some of the image commands may be confusing (e.g. loadPixels, pixels[]). Don't use these.
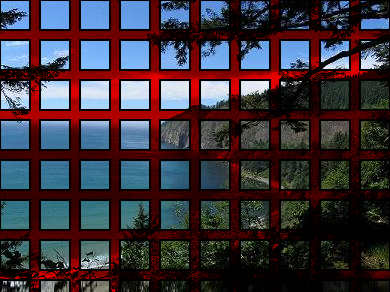
Experiment using for-loops to draw the images and text. For example
|
|
The result will be:
| |
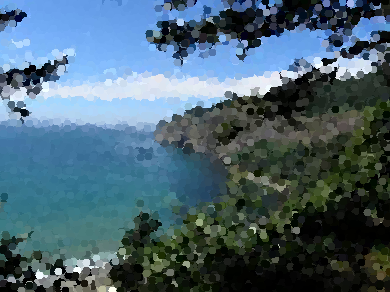
Here is another image example:
|
The result will be:
|
Here is a text example created by modifying the bouncing ball example from lab 3. You need to run it to see the animation:
|
Snapshots are:
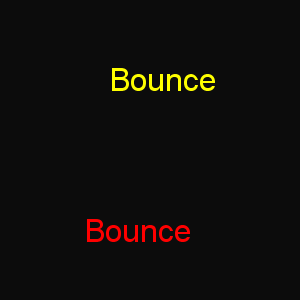
|

|
When writing a program, do not try to write the entire program all at once. If you do, there will be a million errors both syntactically and functionally (i.e. it wont't run and, even if it does, it won't do what you had intended). Programming should be an iterative process. You start with a small portion of what you want to do. You make sure that this small part runs correctly before doing more.
For example, in the assignment below, start by simply loading in and displaying your image(s) somewhere in the window. Perhaps then fix the size to be what you want and place it in the location you want it. Then maybe load in and display your text somewhere in the window. From there, continue to make small additions that eventually get you to the final desired result.
If something confuses you, e.g. the behavior of some function, create a small separate test program that contains only that one thing.
Where possible, break up your code into separate functions, where each function has a clearly identified task. This will make your code easier to read, modify, and debug. We will see more examples of this in later assignments, so don't worry too much if you aren't sure how to do this.
Make use of the special capabilites of your medium. For example, Processing can generate images that require lots of computation (e.g. via for-loops) which would be time consuming and tedious to do in, say Photoshop. Processing also enables you to do animation (using setup() and draw()) as well as interaction (e.g. through mouseX and mouseY).
Select one or more photographs that you or someone you know has taken (do not download images off the internet). Pick images that have meaning to you, perhaps because they contain a person you know or they are of a place you have visited. Resize them using your favorite photo editor so they are an appropriate size for your program.
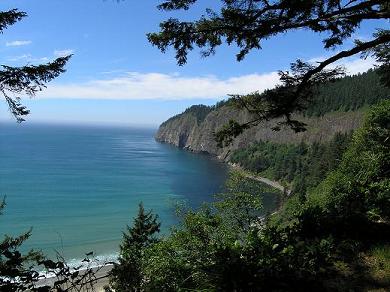
Select text that is connected to the image in some way. The text could just be selected words, or the text could be phrases, full sentences, or even perhaps a short poem. For example, in the image above, one might use the words "blue", "water", "nature", "calm".
Design a collage combining the text and images (the term collage is used very loosely here). The result could be a still image or an animation with or without interaction. Review all of the Processing examples you have seen so far to get ideas of how you can manipulate images and text.
If your program has interaction or is an animation, take a "snapshop" image at some point during the animation so we have an idea of what the program looks like. To do this, add the following function to the bottom of your program. (or see the BouncingText example above):
| Taking a Snapshot |
|
When you run your code, an image will be saved whenever you press a key on the keyboard. Note, this only works if you have a draw() function in your program.
This lab will be graded based on a Pass/Fail basis. A Pass equals 10 points and a Fail is 0 points.
Folder Structure: You should be turning in at least one Processing Sketch. Each sketch folder should contain the *.pde file as well as an image (*.png) (take a snapshot if your program is an animation or has interaction - see instructions above).
Cleaning up the Code: Make sure that you have cleaned up the Processing code as follows:
- Delete any unused sections of code.
- At the top of the code, add comments containing your name, the lab number, the course number, and a one sentence description of what the code does. Add additional comments, if ncessary, so that someone else looking at the code can follow what the code does. This will become more useful as your programs get longer and more complex.
- (THIS IS REALLY IMPORTANT) Run the Auto-format command by going to the Processing menu: Tools→AutoFormat. You may have to do some additional formatting by hand.
Zipping: When you are done doing all of the above, zip together your sketch folder into a single zip file.
By 9am of Tuesday Oct 5 submit the single zipped file via WISE as an attachment.