Lab 5: Sound and Response
CS145: Images and Imagination,
Fall 2010
[previous lab][schedule][next lab]
Due Date:
Monday, Oct 18 at midnight. Note, this assignment will graded (10 pts).
Reading
Audio File Assignments
These assignments are tentative: audio files.
Summary of Goals
The main goals of this lab are to:
- Learn how to use sound.
- Learn how to write algorithms that respond to actions and/or user input.
- Learn how to use 1D arrays to store lists of related data.
- Strengthen the skills you have learned in the previous labs.
A Simple Array Example
Program 1 is a very simple example of an animated ball. The ball drops down vertically.
When it reaches the bottom, it is reset to be at the top again. Run the code to see what
it does.
| Program 1: Single Ball Drop |
int y;       // y location of ball
int dy = 3;  //  Amount y is incremented at each step
int x;       // x location of ball

void setup() {
   size(200,400);
   x = width/2;
   y = (int) random(width);
}

void draw() {
   background(0);
   ellipse(x, y, 15,15);
   y = (y + dy) % height;  // update height
}
|

|
The above program would be a lot more interesting if we could have a lot of
balls all moving independently. One way to do this for would be to declare multiple variables:
int y1, y2, y3, y4;
int x1, x2, x3, x4;
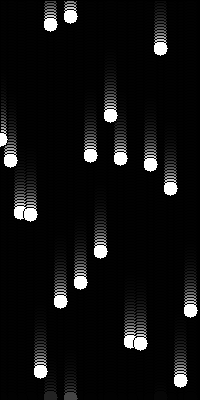
| Program 2: Multiple Ball Drop |
// This program draws n balls evenly spaced across
// the window.  The balls move vertically down.
// When one hits the bottom, it resets back to the top.

int[] y;        // declare array to hold y-values of balls
int n=20;       // number of balls
int dx;         // x spacing between balls
int dy = 3;     // rate of falling

void setup() {
  size(200,400);

  dx = width/n;    // divide width by number of balls

  // Create n spaces to hold y-values
  y = new int[n];

  // Initialize the y values.
  for (int i = 0; i < n; i++) {
      y[i] = (int) random(height);
  }
}

void draw() {
  background(0);
  for (int i = 0; i < n; i++) {
    ellipse(i*dx, y[i], 15,15);
    y[i] = (y[i] + dy) % height;  // update y-values
  }
}
|
|
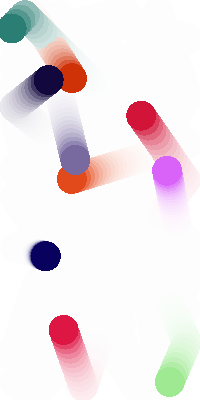
One can modify the above program to include arrays for storing other characteristics for each
ball such as the color, the x value, the dx and dy etc. For example, below is the bouncing
ball program from a previous lab but with 10 balls.
| Program 3: Multiple Ball Bounce |
// Simulates 10 bouncing balls
int maxNum = 10;  //  number of balls
float xLocs[] = new float[maxNum];
float yLocs[] = new float[maxNum];
float dxs[] = new float[maxNum];
float dys[] = new float[maxNum];
color colors[] = new color[maxNum];
float radius = 15;

void setup() {
  size(200,400);
  noStroke();
  fill(0);

  // Initialize the arrays
  for (int i = 0;  i < xLocs.length; i++) {
    xLocs[i] = random(2*radius, width-2*radius);
    yLocs[i] = random(2*radius, height-2*radius);
    dxs[i] = random(-5,5);
    dys[i] = random(-5,5);
    colors[i] = color(random(255),random(255),random(255));
  }
}

void draw() {
  background(255);

  for (int i = 0;  i< xLocs.length;  i++) {
    xLocs[i] += dxs[i];
    yLocs[i] += dys[i];
    if (xLocs[i] < radius  || xLocs[i] > width-radius) {
      dxs[i] = -dxs[i];
    }
    if (yLocs[i] < radius  || yLocs[i] > height-radius) dys[i] = -dys[i];
    fill(colors[i]);
    ellipse(xLocs[i],yLocs[i],2*radius,2*radius);
  }
}
|
|
In the above program, the balls change direction when they hit the wall. This is an example
of an event-response situation. An event (hitting the wall) triggers a response (change in direction).
The event could be any number of things such as a ball hitting another ball or the user clicking the mouse.
The events could also be any number of things such as changing the ball's color or size.
One could also have a sound play. The assignment you will turn in for this lab will require that you
use sounds as the response to some action.
An example of an event triggered by the mouse would be having a ball's color change when the user
clicks on it. To see how this works, add the following function to the bottom of the above program.
| Program 3a: Mouse Event Code for Multiple Ball Bounce |
void mousePressed() {
  for (int i=0; i < maxNum; i++) {
    if ( abs(xLocs[i]-mouseX) < radius && abs(yLocs[i]-mouseY) < radius) {
      colors[i] = color(random(255),random(255),random(255));
      println("hit");
    }
  }
}
|
A Simple Sound Example
Program 4 is a simple program that makes use of sound. Start by creating a blank Processing
sketch and copying in the code below. After you save the sketch, you need to
go to the sketch folder and create a subfolder called audio. You are to place
your sound files into this subfolder. You need to replace the names of the sound files with
the names of the sound files you will use. For now, you may use some of the standard
files that come with Windows, e.g. ding.wav, WinDing.wav,
chimes.wav,
tada.wav. Of course, you may use any files you want, however, it is important that
the sounds be very short and the format should be WAV,
AIFF, or AU. You may or may not have problems with MP3.
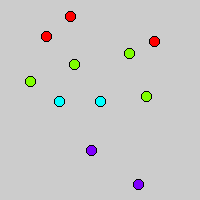
| Program 4: Simple Sound Example |
// Plays a sound and draws a circle when the
// mouse is clicked in window.

// These are the names of the sound files.  Note,
// the files must be placed in your sketch folder
// in a subfolder named "audio". If you don't do this,
// you will get a NullPointer error.
String names[] = {
  "ding.wav","WinDing.wav",
  "chimes.wav","tada.wav"
};

void setup() {
  size(200,200);
  soundSetup();   // initialize sound functions
  colorMode(HSB,names.length,100,100);
}

void draw() {
}

void mousePressed() {
  int n = (int) ( names.length * mouseY/height ) ;
  println("Playing sound " + n);
  mySound[n].play(0);
  fill(n,100,100);
  ellipse(mouseX,mouseY,10,10);
}
|
|
As was the case with the video,
you will need to add a new tab to your sketch program (e.g. called Sound) and copy in the code below.
Note that you need to include this in any program where you use sound. You should not
have to make any changes to it. The above program initializes the sound functionality using the
function call soundSetup() which needs to be in the setUp function. To play the sound, the
uses the command mySound[n].play(0). This will be explained more in class.
| Program 4a: Sound Code (add as extra tab) |
import ddf.minim.*;
Minim minim;
AudioSnippet mySound[];

void soundSetup()
{
  minim = new Minim(this);
  mySound = new AudioSnippet[names.length];
  for (int i = 0; i < names.length;i++) {
    mySound[i] = minim.loadSnippet("audio/"+names[i]);
  }
}

void stop()
{
  for (int i = 0; i < names.length;i++) {
    mySound[i].close();
  }
  minim.stop();
  super.stop();
}
|
Run the program. When you click in the window, a different sound should play depending on the y value of the
mouse click. An ellipse appears where you click whose color is linked to the choice of sound. We will go over the code
in class.
Program 5 is another example using sound. It is the same as Program 1 but with sound added. The
event that triggers the sound is the ball reaching the middle or bottom of the window. The response
is one of two different sounds.
Program 5: Ball Drop with Sound
Requires the sound code (Program 4a) and
the audio files in the sketch folder. |
// Plays a sound when a dropping ball hits
// the middle and bottom of the window.
int y;
int dy = 3;
String names[] = {"ding.wav","WinDing.wav"};

void setup() {
  size(200,400);
  soundSetup();
  y = (int) random(width);
}

void draw() {
  background(0);
  int x = width/2;
  ellipse(x, y, 15,15);
  y = (y + dy) % height;

  if ( y >  height-3) {
    mySound[0].play(0);
  }
  else if (  abs(y - (height/2) )  < 2 ) {
    mySound[1].play(0);
  }
}
|
Assignment
In this lab, you will be given a set of sounds created by students in Musc 121. The sounds
vary in pitch, register, and synthesizer name. You do not need to use all of the sounds but you should
use at least 5 or 6. As described above, you will need to place the sounds in your sketch folder in
a subfolder called audio (if you don't place them in exactly this location, you will get a NullPointer
error when you try to run the code).
The sounds are to be used as a response to some event. The event might be a user
action (e.g mouse click or key press) or it could be based on something that is happening during
the animation going on in the window (e.g. ball hitting a wall).
Recommendation: Limit the frequency of events that trigger the sound.
If events occur too frequently, the sounds will run into each other.
When you are done, export your program to a Java Applet by going to the Processing menu and choosing "export".
This will create a new subfolder in your sketch folder called "applet". You will need to copy your audio folder
into the applet folder. You can test the applet by double clicking
on the file called index.html that is located in the applet folder. When you do this, a browser should open up
with your applet running in it. We have had problems on some computers with the applets not running. If yours doesn't run
on your computer, it may run on a different computer. If you just can't get it to run anywhere, don't worry about it.
To Be Submitted
This lab will be graded based on a 10 point scale. As in previous labs, zip together your entire sketch folder (with applet and sounds)
and add as an attachment in WISE. Please don't forget to follow the steps below for cleaning up your code. Points will be
taken off if you do not do this. Clean, well commented, and easy to understand code is very important.
Preparing the files for submitting to WISE:
Files: You should be turning in one Processing Sketch. The sketch folder should
contain
- the *.pde files (including Sound.pde)
- the audio files
- A single image snapshot. See lab 4 for how to take the snapshot.
Cleaning up the Code: Make sure that you have cleaned up the Processing code as follows:
- Delete any unused sections of code.
- At the top of the code, add comments containing your name, the lab number, the course number,
and a one sentence description of what the code does. Add additional comments, if
ncessary, so that someone else looking at the code can follow what the code does. This
will become more useful as your programs get longer and more complex.
- (THIS IS REALLY IMPORTANT) Run the Auto-format command by going to the Processing menu: Tools→AutoFormat.
You may have to do some additional formatting by hand.
Zipping: When you are done doing all of the above, zip together your sketch folder
into a single zip file.
Submitting to WISE:
By midnight of Mon, Oct 18, submit
the single zipped file via WISE as
an attachment.
[top] [Schedule]
[Home]