|
Lab 6: Textures
|
|
|
Lab 6: Textures
|
Before you begin, review the following:
Begin with your completed car project from lab 5.
Texture Coordinates
Modify the code for each of your objects (Cube, Cylinder, etc ) to include a new attribute variable for texture coordinates:
tex_coords = new vec2[numVertices];
Texture Objects
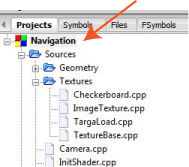
Download the folder Textures and place it and all of its contents into your project folder. Don't forget to add the files to the Codeblocks project. The folder contains the following files:
The Textures folder also contains the following files which will be used in the second part of this lab:
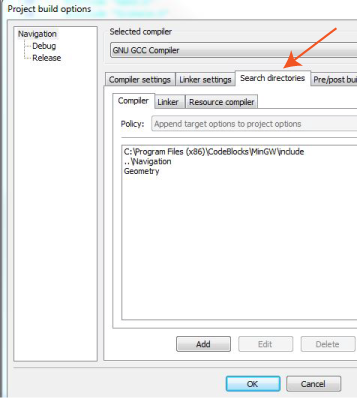
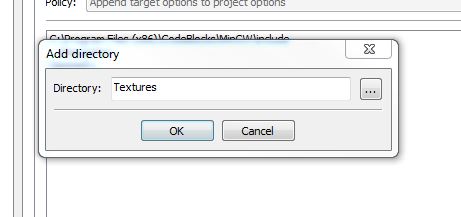
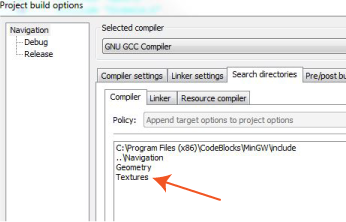
Search Directories: Not only do you need to add the individual files to the project, but you also need to let Codeblocks know about the Textures folder. Therefore, you need to add this folder to the list of Search Directories. To do this:
Application Program
In the application program (main.cpp), create a Checkerboard object (don't forget the header file as well)
In init():
program = InitShader( "vertexPhong.glsl", "fragmentPhong.glsl" );
Shaders
Modify the vertex and fragment shaders as discussed below. Most of these changes may already be in your code. If so, just take note of what they are and what they do.
The instructions below assume you are using the Phong shader (as opposed to the Gouraud shader), so that your color calculations are done in the fragment shader.
The Vertex Shader:
in  vec2 vTexture;  // in from the attribute variable
out vec2 texCoord;  // out to the rasterizer and fragment shader
texCoord = vTexture;
The Fragment Shader:
in vec2 texCoord;
uniform sampler2D texture;
vec4 myColor = model_color;
vec4 myColor = texture2D( texture, texCoord );
vec4 myColor = model_color*texture2D( texture, texCoord );
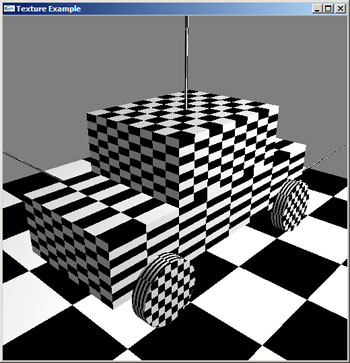
You should be able to run the code to see one of the images below. Once the code is working, create a new procedural texture (modeled after Checkerboard) and apply it to the objects in the scene. Some examples are at 2D Procedural Textures
 |
 |
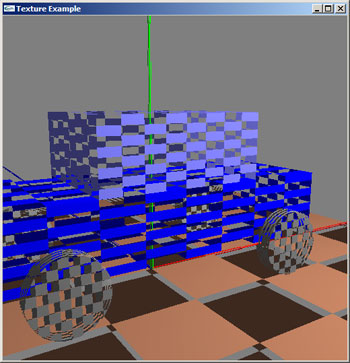 |
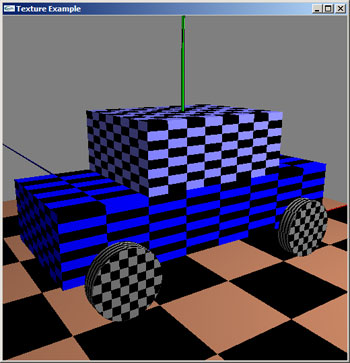
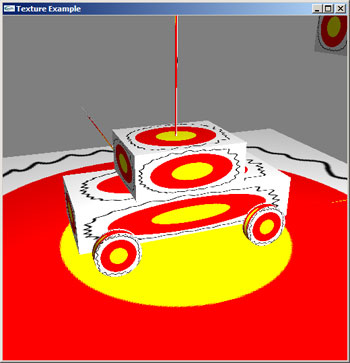
| Car with lighting and texture. | Car with model_color combined with texture. |
Car with black elements discarded. |
To use images as textures, you need to be able to read images into your c++ code. We limit ourselves to tga files because they are easy to read. You may use Photoshop (or other program) to convert your own images to this format. However, if you use your own images, it is recommended that you resize them so that both their width and height are powers of 2. Odd sized images don't always render properly.
The files you need were added when you included the Textures folder. They are

Just as you did in the previous section with the Texture class, create an ImageTexture object in the application program (main.cpp), and call setUp(program) from the init() method (after "program" is already created):
ImageTexture myImageTexture("Textures/images/test.tga");Just before you draw an object, you can set which texture to use by calling bind():
myImageTexture.bind(program);If everything is black when you run the program with the image texture, it may be that it is not finding the tga file. An error will be generated on the console if this is the case. Make sure that you have the path set properly. Another reason it may not find the file is because you do not have the project's execution directory set properly. Go to the menu: "Project->Properties...", then click on the tab "Build Targets", and make sure the "Execution working dir" is set to "..\Nagivation" (this assumes your project name is Navigation).
Of course, you generally don't want everything to have the same type of texture. For example, you may want one shape to use the model_color, another to have a checkerboard, and another to have an image. It is simple to switch between different textures. In your code, you have created two different texture objects, a checkerboard and an image. All you have to do is to bind the desired texture just before you are about to draw a shape. For example, if my image texture object is called myImageTexture, then you add the line:
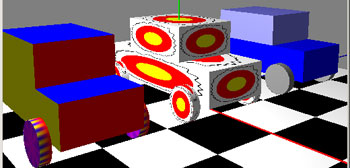
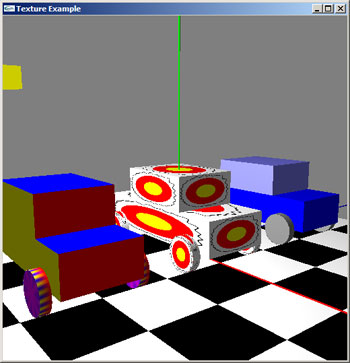
myImageTexture.bind(program);If you want some shapes to use the model_color and others to use vColor or textures, then it is more complicated. One option is to create different shader programs. However, in this case, we are only wanting to change one line in the shader code so it makes more sense to introduce a new uniform variable that is a flag indicating whether one wants to use model_color, vColor, or textures. The image below shows 3 cars, one is drawn with the image texture, one is drawn using the model_color, and one is drawn using vColor. The ground is drawn with the checkerboard texture.
No later 5pm on Tues, Nov 11, demonstrate your final program (the one with different textures and coloring) in lab and submit this code via WISE Assignments. Include a snapshot of your scene. Zip together your codeblocks project (please delete the bin and obj folders) and submit via WISE.