-
Pick a Partner: In this lab you will work with one other person.
A goal of the lab is to learn how to work with other people; working alone on this lab is not an option.
-
Folders: On cs-render, in folder \IDS252Sp18\Lab6\MayaProjects,
create a folder whose name is derived from both partners' names, e.g. using last names.
Place your Maya project and editing subfolders in this folder. There should be only one Maya
project - it will contain the maya scene files for both partners.
Also create a folder in \IDS252Sp18\Lab6\FinalAnimations
with the same name you used for the folder in MayaProjects.
When you have completed the lab, please copy your animation over to this folder. Name your quicktime animation file based on
the names of both partners AND the initials of the musician(s). Also place your final colaboration form and storyboards
in this folder. These will be described below.
-
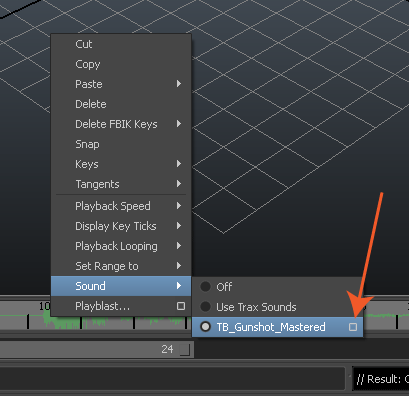
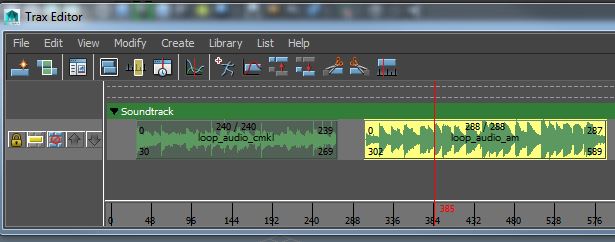
Foley: The animation should contain two or more foley sounds.
A variety of foley sounds are available in the folder \IDS252Sp18\Lab6\FOLEY. You
may use any of the sounds.
-
The Animation: The animation should be a brief scenario lasting 15-20 seconds with 1 or 2 characters.
Use the foley sound to direct what the scene is about. Listen to the sounds you have been chosen and
brainstorm ideas about what these sounds represent. Keep the scenerio simple. It is better to have high quality animation that is simple and expressive than to have a complex but awkward animation. The focus should be on gesture and sound.
-
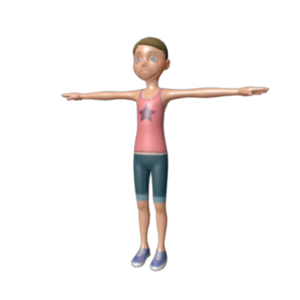
Characters: The characters should be chosen from the rigged characters: Bloke, Bony, or Andy. It is suggested that you do not use Moom since his textures are problematic with MentalRay.
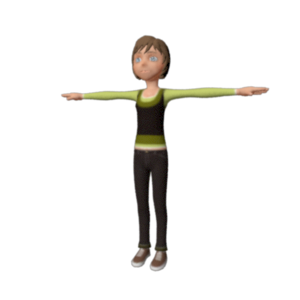
Andy (short for androgynous) is
a character you haven't seen so far. The rig has the advantage that one can select different parameters to give
the appearance of a girl/boy/man/woman, for example:
If you use Andy, you can find the files on cs-render in the folder
\IDS252Sp18\IDS252Resources\Rigs\AndyFiles. Note, you need to copy the Andy scene file
(andyRigv1.4.6.ma) into your own project's scenes folder and you need to copy
all of the files/folder in the sourceimages files into your own project's sourceimages folder. If you don't see the textures when you open the scene file, it is because you
either placed the sourceimages in the wrong place or you did not first set the project.
If you plan on having more than one character in your scene, make sure they are distinguishable either by using a different rigged character or by changing the appearance of one of them. For example, if you have 2 blokes, you can change the color or give one of them a hat.
-
Environment: The environment should be minimal, e.g. containing
only a few objects (if any) other than the characters themselves. Any objects that do appear should be there for a reason, i.e. they should
play a part in the interaction or in setting the mood or scene. Shading and texturing can be minimal, however,
do pay attention to lighting
and to a choice of color scheme.
-
Camera: It is recommended that you use only a few stationary cameras with simple cuts as the transitions. Pay attention to
continuity between cuts. It isn't necessary, but to manage the cameras, you may optionally want to use Maya's
camera sequencer and
ubercam .
Storyboarding: Once you and your partner have decided on a scenerio, do the following:
- Download the Lab 6 Collaboration Form (doc) and write out your scenario description in words
(a few sentences or a paragraph is fine). The Shot List and Task List will be described below.
- Once you have written the text, sketch out the primary actions (very rough storyboards) on paper. (See Storyboard resources.) It does not matter if you
can't draw. Stick figures are ok. Pay attention to the camera location (framing) and relationship of the characters to each other and the camera (staging)
as well as the characters' gesture (body pose/language). This is exploratory.
The goal is to begin to hash out with your partner the visual
elements of the story before you invest a lot of time implementing anything in Maya.
Act out the scene to get an idea of the approximate timing. Remember, the final animation should be between 15 and 20 seconds.
Indicate on the storyboards where the foley will be.
- When you are ready to animate, you are to use these storyboards to block in the
key frames using pose-to-pose animation.
Division of Labor:
The Collaboration Form is your contract with your partner. It identifies who will be doing what. By writing it out,
you will avoid a lot of potential conflict and finger pointing down the road (believe me):
- Task List:
In your Collaboration Form, which so far contains your story description, you
will see a Task List. Decide which partner will be responsible for which task and
place their names into the appropriate slots. Note, the editor is the person responsible for putting the animation together in Adobe Premiere.
- Shot List:
Break the scenario into its "shots". A shot typically corresponds to a camera sequence (i.e. separated by cuts) but it can also just be a
convenient spot for a transition (e.g. a character walks off the screen at the end of shot 1 and comes back at the beginning of shot 2).
Each shot should be assigned to one of the partners. Each partner is
responsible for all of the animation in their assigned shots. It is common in an animation for more than one animator to animate a particular character.
If you feel strongly about changing this, consult with the
instructor. In any case, each person must do some amount of animating -
it is not ok for one person to do it all.
Once you have decided the shot break down and who will do what, fill in the Shot List contained in your
Collaboration Form. Be sure to fill out all columns of the form. The content may be
modified as you go but it is important to have a starting point. If you do make changes, it is important that you
update this form (make a new version rather than deleting the original).
-
Project Setup:
Once all of the above has been completed, you can now get started in Maya.
- You and your partner are to create a single Maya project in which to work. There will
generally be a different scene file for each shot but use your best judgement. All of the assets (characters, props, etc) should be in their own individual scene files. These assets will be referenced into the shot's scene file. Thus, there should be a separate scene file for each of the following:
- Each character
- Each prop
- The environment (may contain all of the props which have been imported or referenced)
- Each shot where each shot will reference (not Import!) the environment and the characters in that shot.
When possible, avoid multiple levels of referencing
(e.g. a file references a file which references a file ...). Before creating the references, be sure that the characters, props, and environment
being referenced are cleaned up.
- Make sure that all assets (e.g. textures, maya scenes, sounds, source images, etc)
are somewhere inside the project folder.
- Remember, don't use the default lambert material (lambert1) because Maya will get
confused if different referenced files have a different "default" material. Instead, always create new material for your models. It is also recommended that you rename any materials you create so that you can identify them easily in the hypershade.
- Display Layers: Learn how to use display layers so that you can focus on only the parts that you are working on (ask if you
don't remember how to set these up).
- Be careful - you and your partner should never have the same scene file open in Maya at the same time. If one person saves
the file, it can delete the work of the other person.
Before beginning to animate, have the instructor review your storyboards and your completed Lab 6 Collaboration Form containing the
story description, shot list, and task list.