Milestone 3: Through 1 rotor
So far in this assignment, you’ve implemented lots of graphics and the underlying classes, but haven’t as yet done any encryption. Since Milestone 3, your program has responded to pressing the letter Q by lighting the lamp for the letter Q. Had the Germans used a machine that simple, the code breakers could all simply have gone home!
The Enigma machine encrypts a letter by passing it through the rotors, each of which implements a simple letter-substitution cipher dictated by its internal wiring. Instead of trying to get the entire encryption working at once, it makes much more sense to trace the current through just one step of the Enigma encryption. For example, suppose that the rotor setting is AAA and the Enigma operator presses the letter Q. Current flows from right to left across the fast rotor, as shown below in Figure 1.
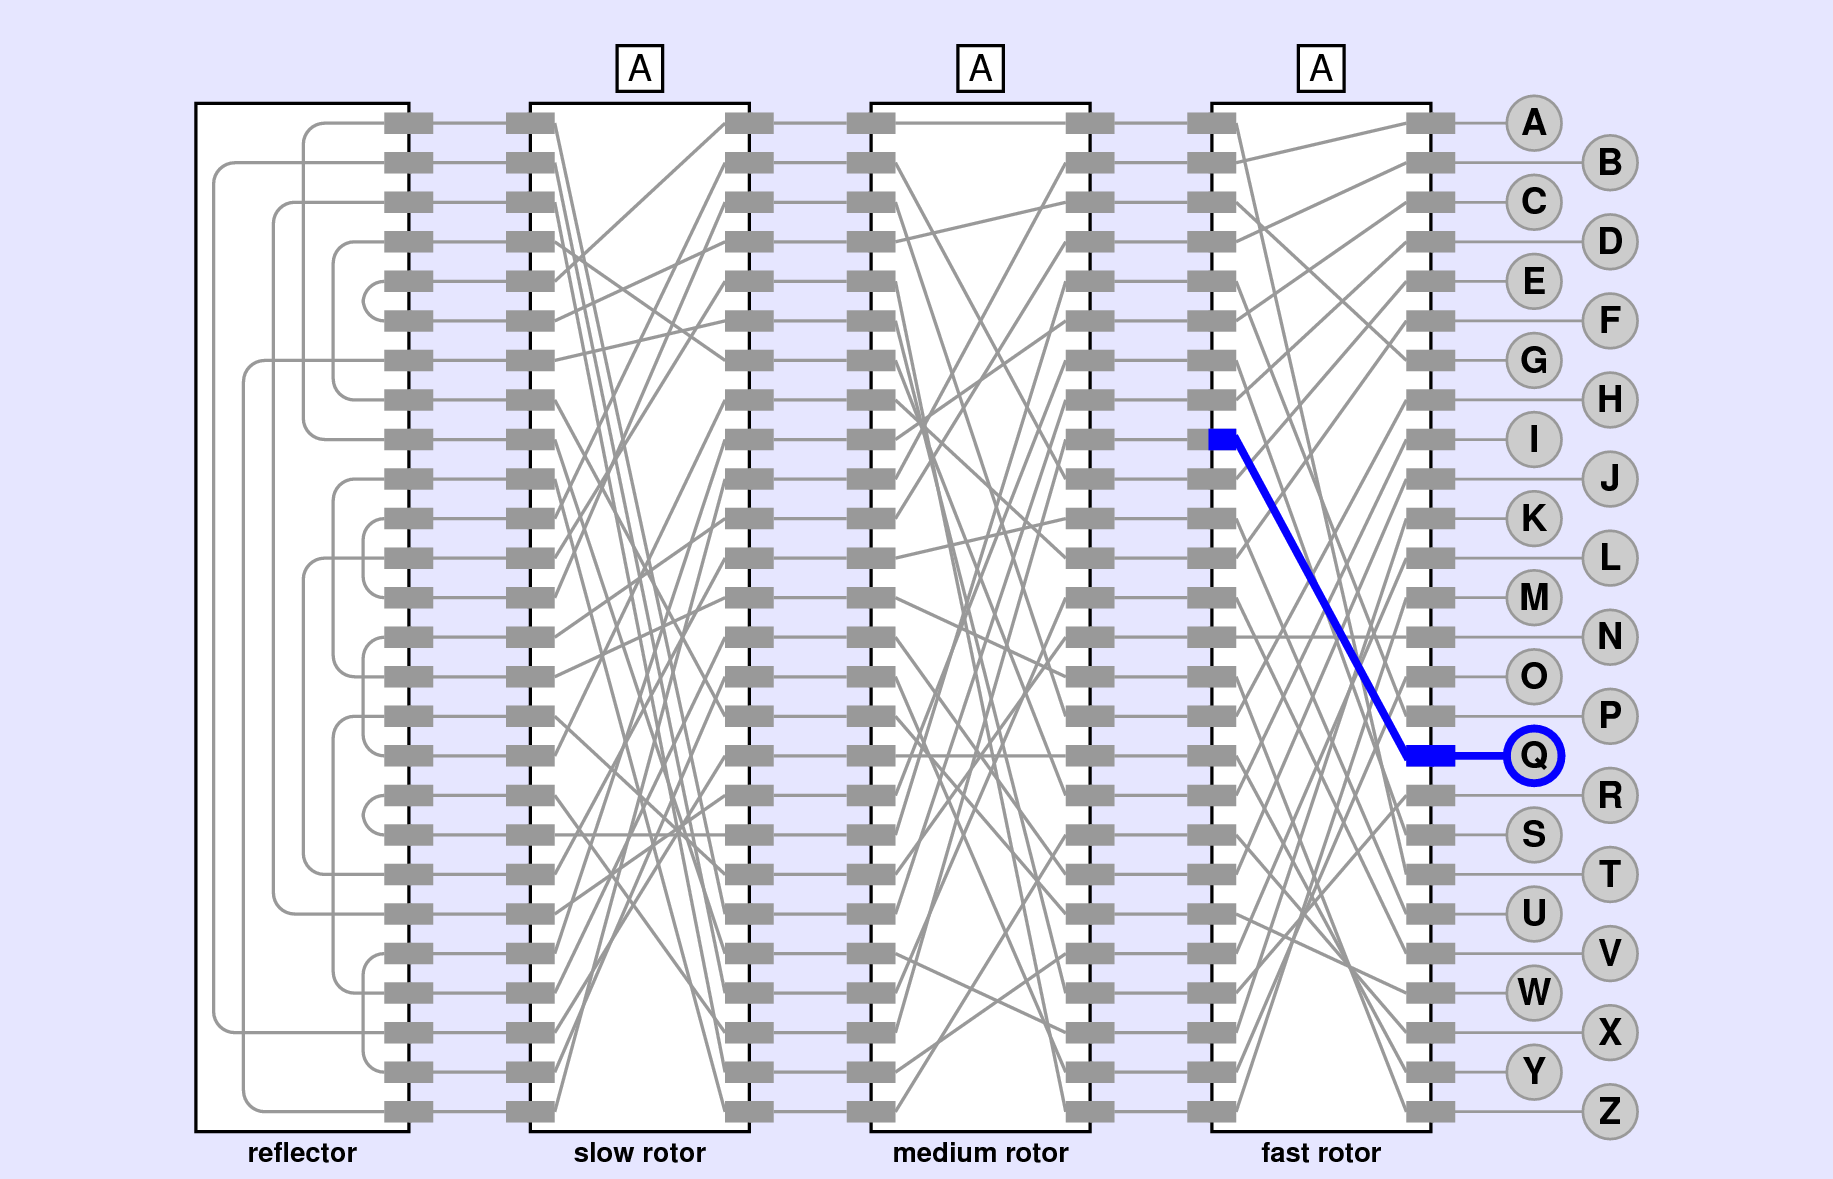
Q.
If we look at the letter Q, it is the 17th letter of the alphabet (index 16). As such, when we press Q, the index-16 contact on the right of the fast rotor is energized. What is the corresponding contact on the left of the rotor that is energized? To determine that, we simply need to look at the corresponding wiring offset!
The wiring offsets for the fast rotor look like:
[ 1,2,3,4,5,6,22,8,9,10,13,10,13,0,10,15,(18),5,14,7,16,17,24,21,18,15 ]where I have placed parentheses around the index-16 element, showcasing that the wire connects to a point 18 contacts from its starting point at contact 16. Now if we take 16 (the starting position) and add 18 (the offset), we get a value of 34. But there are only 26 possible contacts! This is where we need to remember that the rotors are circular, so that if you count past index-25 you loop back around to 0. The easiest way to accomplish this in code is with the remainder or modulo operator. If we look at 34 % 26, we get a value of 8, which is the contact that will be energized on the left side of the fast rotor. This would correspond to the letter I.
The lovely part of this approach is that, because we are already sliding all the offsets forward in the wiring offsets attribute each time the rotor advances, this approach will work no matter what position the rotor is in. All we need to do is take the index of the incoming signal, look up the current wiring offset at that position, and add the offset to the index, looping back to the beginning as necessary.
The strategy is best accomplished by defining a right_to_left method inside your rotor class, which accepts an index as an argument. The method should then just return what the output index would be on the left side of the rotor.
Then, in EnigmaModel.py, you just need to update your key_pressed and key_released methods. Whichever key is pressed (or released) you just need to determine what index it corresponds to in the alphabet, and then pass that index into the right_to_left method of the fast rotor. Then light up the lamp that corresponds to the output!
Pressing the Q key when the rotor setting is AAA should light up the lamp for the letter I. If you click on the fast rotor to advance the rotor setting to AAB, clicking Q again should light the lamp for the letter V.